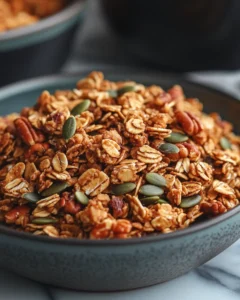
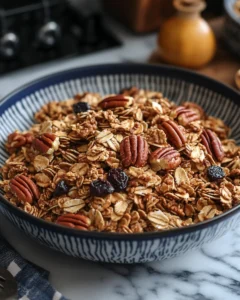
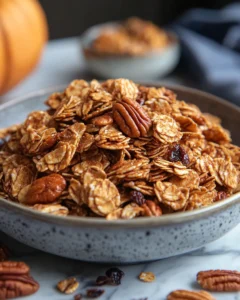
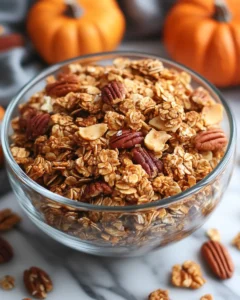
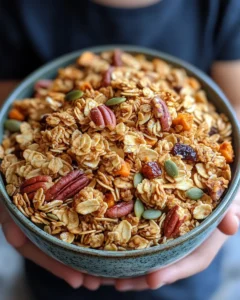
There’s something magical about the crisp air of fall that calls for cozy flavors, comforting aromas, and warming kitchen traditions. When the leaves start turning golden and the mornings feel just a little cooler, it’s the perfect time to bring pumpkin spice into your life in more than just lattes. That’s where Pumpkin Spice Granola Clusters come in—a crunchy, sweet, and lightly spiced snack that captures the very essence of autumn. Inspired by cozy weekends spent baking at home and the nostalgia of holiday flavors, this recipe is perfect for making big batches to enjoy all season long. Whether sprinkled over yogurt, paired with fresh fruit, or eaten by the handful straight from the jar, these granola clusters are destined to become a fall favorite in your kitchen.
Why You’ll Love Pumpkin Spice Granola Clusters
- Crunchy and satisfying: Every bite offers a balance of crispy oats, nuts, and chewy dried fruit.
- Perfectly spiced: Pumpkin pie spice adds warmth and depth that tastes like fall in every bite.
- Customizable: You can easily swap nuts, seeds, or dried fruit to suit your preferences.
- Great for gifting: Pack them in mason jars or treat bags for a thoughtful homemade present during the holidays.
- Healthier snacking option: Packed with fiber, protein, and natural sweetness, it’s a guilt-free treat you can feel good about.
Ingredients You’ll Need
To make these flavorful pumpkin spice granola clusters, you’ll need a mix of pantry staples and seasonal flavors:
- 3 cups old-fashioned rolled oats
- 1 cup chopped pecans (or walnuts, almonds, or cashews)
- ½ cup pumpkin seeds (pepitas)
- ½ cup shredded unsweetened coconut (optional)
- 1 teaspoon pumpkin pie spice
- ½ teaspoon ground cinnamon
- ¼ teaspoon salt
- ½ cup pure pumpkin puree
- ⅓ cup pure maple syrup or honey
- ¼ cup coconut oil (melted) or olive oil
- 1 teaspoon pure vanilla extract
- ½ cup dried cranberries (or raisins, dried cherries, or apricots)
Step-by-Step Directions
1. Preheat and Prepare
Begin your granola-making journey by preheating your oven to 325°F (165°C). Setting your oven at the right temperature is crucial, as it ensures that the granola bakes evenly without burning. While the oven warms up, line a large baking sheet with parchment paper. This simple step not only prevents the granola from sticking but also makes cleanup a breeze once the clusters have cooled and hardened. If you don’t have parchment paper, a silicone baking mat is an excellent reusable alternative that works just as well.
2. Mix Dry Ingredients
Next, grab a spacious mixing bowl and combine your dry ingredients: rolled oats, chopped pecans, pumpkin seeds, shredded coconut, pumpkin pie spice, cinnamon, and a pinch of salt. The oats provide the base for the granola, while the nuts and seeds contribute a satisfying crunch and added nutrition. The spices are what give this recipe its signature autumn flavor, so make sure to stir thoroughly, ensuring that every oat and nut is evenly coated with warm, fragrant seasoning. This step sets the stage for perfectly balanced flavor in every bite.
3. Prepare Wet Mixture
In a separate, medium-sized bowl, whisk together the pumpkin puree, maple syrup (or honey), melted coconut oil, and vanilla extract until the mixture is silky smooth. This wet blend acts as the glue that binds the dry ingredients together, giving the granola its signature clusters. The pumpkin puree doesn’t just add seasonal flavor—it also provides natural moisture and richness. The maple syrup or honey introduces just the right amount of sweetness, while the coconut oil ensures the granola bakes up crisp and golden. Vanilla rounds out the mix with a hint of depth and warmth.
4. Combine and Coat
Now comes the fun part: combining the wet and dry mixtures. Pour the pumpkin mixture over the spiced oats, nuts, and seeds. Use a spatula or wooden spoon to stir slowly and deliberately, making sure every oat and nut is fully coated. The key here is patience—take your time to fold and mix so the wet ingredients reach every nook and cranny. This even coating will help your granola form satisfying clusters instead of crumbling apart once baked.
5. Bake the Granola
Spread the coated mixture evenly across the prepared baking sheet, creating a flat, compact layer. If you prefer larger clusters, press the mixture down gently with the back of your spatula. Slide the tray into the preheated oven and bake for 30 to 35 minutes, turning the sheet halfway through to promote even baking. Resist the urge to stir too often; moving the mixture too much will break apart potential clusters. When finished, your kitchen should smell like pumpkin spice heaven, and the granola should appear golden brown and slightly crisp at the edges.
6. Cool and Add Fruit
Once baked, remove the tray from the oven and allow the granola to cool completely on the sheet. This step is absolutely vital, as cooling is what solidifies the clusters and enhances their crunch. If you handle the granola too soon, it may crumble apart. Once fully cooled, sprinkle in dried cranberries or your favorite dried fruit. The fruit adds a pop of chewy texture and natural sweetness that balances the warm spices beautifully.
7. Store and Enjoy
Finally, transfer your cooled granola clusters into an airtight container, such as a glass jar or resealable bag. Proper storage will keep them fresh and crunchy for up to two weeks at room temperature. For longer storage, freeze in portion-sized bags for up to three months. Enjoy your clusters sprinkled over yogurt, paired with fresh fruit, or simply eaten by the handful as a wholesome snack. With every bite, you’ll taste the comfort and coziness of fall captured in these golden, spiced clusters.
Tips for the Best Pumpkin Spice Granola Clusters
- For extra crunch: Bake the granola a little longer, but watch carefully to prevent burning.
- Make it gluten-free: Use certified gluten-free oats.
- Sweeter option: Add a tablespoon of brown sugar or coconut sugar for extra caramelized flavor.
- Bigger clusters: Don’t stir the granola too much during baking—press it down firmly and let it cool before breaking apart.
- Storage tip: For longer shelf life, store in the freezer for up to 3 months.
Delicious Ways to Enjoy Pumpkin Spice Granola Clusters
This recipe is versatile, which makes it fun to experiment with different pairings:
- Breakfast bowl: Sprinkle over Greek yogurt with fresh apples or pears.
- Snack on the go: Pack in small containers or zip-top bags for road trips or work snacks.
- Dessert topper: Use as a crunchy garnish for ice cream, pudding, or baked apples.
- Holiday treats: Mix into white chocolate bark or use to top pumpkin pie.
Health Benefits of Pumpkin Spice Granola Clusters
Homemade granola isn’t just about taste—it’s also packed with nutrients:
- Oats: Rich in fiber and great for heart health.
- Pumpkin seeds: A source of plant-based protein, magnesium, and zinc.
- Nuts: Provide healthy fats that keep you full and energized.
- Pumpkin puree: Adds vitamin A, potassium, and antioxidants.
- Maple syrup or honey: Natural sweeteners that bring a touch of energy without refined sugar overload.
When enjoyed in moderation, these clusters can be a delicious part of a balanced lifestyle.
Variations and Substitutions
- Nut-free version: Replace nuts with sunflower seeds or more pumpkin seeds.
- Chocolate lovers: Stir in dark chocolate chips after the granola cools.
- Spice it up: Add a pinch of ground ginger or nutmeg for even more warmth.
- Fruit swap: Try dried blueberries, figs, or apricots for variety.
Make-Ahead and Storage Guide
One of the best parts of this recipe is how well it keeps:
- Room temperature: Store in an airtight jar or container for up to 2 weeks.
- Freezer: Freeze in portions for up to 3 months; just thaw before serving.
- Gift giving: Package in glass jars with a ribbon and a handwritten tag for a festive holiday gift.
Frequently Asked Questions
1. Can I use quick oats instead of rolled oats?
Rolled oats are the best choice for this recipe because they hold their shape and create the crunchy, hearty texture that makes granola clusters so irresistible. Quick oats are more processed and thinner, which means they can absorb liquid too quickly and bake into a softer, more crumbly mixture. If you use them, you may not get those satisfying, chunky clusters. However, in a pinch, quick oats can work if you don’t mind a looser, finer granola texture.
2. Do I need to use pumpkin puree?
Yes, pumpkin puree is an essential part of this recipe. It not only delivers the seasonal flavor we all love but also acts as a natural binder that helps the granola stick together. Without it, the oats and nuts may not form into clusters. Be sure to use pure pumpkin puree and not pumpkin pie filling, which has added sugars and spices that could alter the flavor and texture. If fresh pumpkin puree is available, you can use that as well—just make sure it’s smooth and not too watery.
3. Can I make this recipe vegan?
Absolutely! This recipe can easily be adapted for a plant-based lifestyle. Simply swap the honey for pure maple syrup or even agave nectar. Stick with coconut oil (or another neutral plant-based oil) instead of butter to keep the recipe dairy-free. With these small adjustments, you’ll have a completely vegan-friendly granola that still tastes indulgent and delicious.
4. How do I get bigger granola clusters?
If you love large, crunchy chunks of granola, the secret lies in how you bake and cool the mixture. Press the granola firmly onto the baking sheet with the back of a spatula before placing it in the oven. While baking, resist the urge to stir too much—this breaks up the clusters. Once baked, let the granola cool completely without touching it. As it cools, it hardens and naturally forms bigger, sturdier clusters. Patience here truly pays off.

