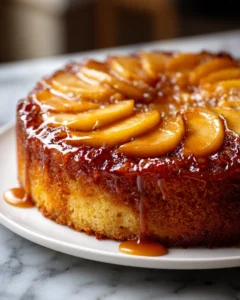
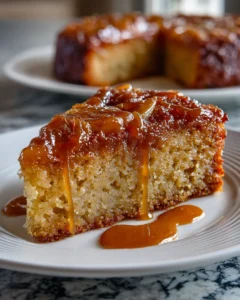
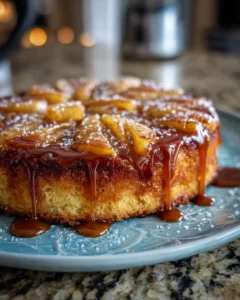
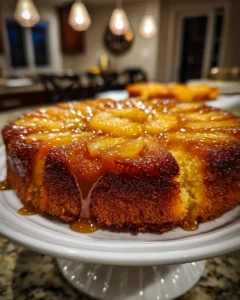
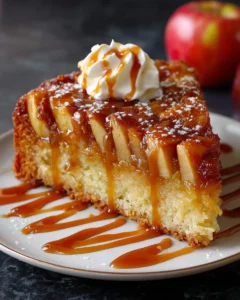
There’s something undeniably comforting about the aroma of baked apples and warm caramel filling a kitchen on a crisp autumn evening. A Caramel Apple Upside-Down Cake is more than just a dessert—it’s a celebration of fall flavors and cozy moments. Imagine gathering around the table with family or friends, the soft, buttery cake layered with tender caramelized apples stealing the spotlight. Its golden, glossy top isn’t just beautiful; it’s a promise of indulgent sweetness and nostalgia.
This recipe is inspired by the timeless tradition of upside-down cakes, a dessert that traces its roots back to classic American baking while adding the rich, sweet tang of caramelized apples. It’s perfect for holiday gatherings, Sunday brunches, or simply as a treat to unwind after a busy day. With every bite, the tender cake and gooey apple topping remind us that the simplest ingredients—apples, sugar, butter, and spices—can create something truly magical.
Ingredients
Before you start baking, gather the following ingredients. Using fresh, high-quality produce will make a significant difference in flavor and texture.
For the Caramel Apple Topping
-
4 tablespoons unsalted butter
-
1/2 cup packed brown sugar
-
2 large apples, peeled, cored, and sliced into thin wedges
-
1 teaspoon ground cinnamon
-
1/4 teaspoon ground nutmeg (optional, for extra warmth)
For the Cake Batter
-
1 1/2 cups all-purpose flour
-
2 teaspoons baking powder
-
1/2 teaspoon baking soda
-
1/4 teaspoon salt
-
1/2 cup unsalted butter, softened
-
1 cup granulated sugar
-
2 large eggs
-
1 teaspoon pure vanilla extract
-
1/2 cup sour cream or plain Greek yogurt
-
1/4 cup whole milk
Step-by-Step Instructions
Creating this Caramel Apple Upside-Down Cake is easier than it looks, but taking your time with each step ensures a tender, flavorful cake with beautifully caramelized apples on top. Follow these instructions carefully, and you’ll end up with a dessert that looks as stunning as it tastes.
Step 1: Prepare Your Pan and Topping
Start by preheating your oven to 350°F (175°C). This ensures that when your cake goes in, the heat is even, giving you a perfectly baked dessert. Next, prepare your pan. Grease a 9-inch round cake pan generously with butter, then lightly dust it with flour. This double layer of protection will prevent the cake from sticking, making the inversion process much easier later on.
Now, let’s focus on the star of the show: the caramel apple topping. In a small saucepan over medium heat, melt 4 tablespoons of butter. Once melted, stir in 1/2 cup of packed brown sugar. Cook the mixture gently for 2–3 minutes, stirring constantly until it becomes smooth, glossy, and starts to bubble lightly. The aroma of caramel will fill your kitchen—this is your first hint of the indulgent flavors to come.
Carefully pour the caramel mixture into the prepared pan, spreading it evenly across the bottom. Then, arrange the apple slices in a circular, overlapping pattern on top of the caramel. The presentation matters here, as this will be the top of your cake once inverted. Sprinkle the apples with 1 teaspoon of ground cinnamon and a pinch of nutmeg for a warm, aromatic touch. This step not only enhances flavor but also adds a beautiful, inviting color to your topping.
Step 2: Mix the Dry Ingredients
In a medium-sized bowl, combine the dry ingredients for your cake. Whisk together 1 1/2 cups of all-purpose flour, 2 teaspoons of baking powder, 1/2 teaspoon of baking soda, and 1/4 teaspoon of salt. This ensures that the leavening agents are evenly distributed throughout the flour, which helps the cake rise evenly and maintain a light, fluffy texture. Set the bowl aside while you move on to the wet ingredients.
Step 3: Cream Butter and Sugar
In a large mixing bowl, cream together 1/2 cup of softened butter and 1 cup of granulated sugar using a hand mixer or stand mixer. Beat for 3–4 minutes until the mixture is light, fluffy, and pale in color. This step incorporates air into the batter, which contributes to a tender, airy cake.
Next, add two large eggs one at a time, beating well after each addition to ensure the eggs are fully incorporated. Then, stir in 1 teaspoon of pure vanilla extract, which adds a subtle depth of flavor that complements the sweetness of the caramel and the apples.
Step 4: Combine Wet and Dry Ingredients
Now it’s time to combine the wet and dry elements of your batter. In alternating additions, mix in the flour mixture and the milk-sour cream mixture (1/2 cup sour cream and 1/4 cup milk), beginning and ending with the flour mixture. Stir gently until just combined—overmixing can result in a dense cake rather than a light and tender one. Take your time here; folding the ingredients carefully ensures the perfect texture.
Step 5: Assemble and Bake
Gently pour the batter over the prepared apple slices and caramel in your pan, using a spatula to spread it evenly. Take care not to disturb the arrangement of the apples, as this will be the visible top of your cake.
Bake the cake for 40–45 minutes, or until a toothpick inserted into the center comes out clean. The cake should be golden brown, with a subtle aroma of caramelized apples and warm spices filling your kitchen. Once baked, allow the cake to cool in the pan for 10–15 minutes. This resting time helps the caramel set slightly, making the inversion process smoother.
Step 6: Invert and Serve
Run a knife around the edges of the cake to loosen it from the sides of the pan. Place a serving plate over the pan and carefully invert it, lifting the pan to reveal the caramelized apple topping. If any apple slices stick to the pan, gently press them back into place.
Your cake is now ready to serve. Enjoy it warm for the best flavor and texture, or at room temperature if preferred. For an extra indulgent treat, add a scoop of vanilla ice cream or a dollop of whipped cream to each serving. The combination of soft, buttery cake, tender apples, and rich caramel creates a dessert that is not only delicious but also visually stunning.
Tips for the Perfect Caramel Apple Upside-Down Cake
Choose the Right Apples
For the best flavor and texture, use firm apples that hold their shape during baking, such as Honeycrisp, Fuji, or Granny Smith. Combining sweet and tart apples adds depth to the cake.
Make the Caramel Topping First
Preparing the caramel mixture ahead ensures it’s smooth and evenly coats the bottom of the pan. Avoid overcooking, as burnt caramel can become bitter.
Don’t Overmix the Batter
Overmixing can make the cake dense. Mix until just combined for a tender, fluffy crumb.
Serve Warm for Maximum Flavor
The flavors of caramelized apples and warm cake are at their peak when served slightly warm. Leftovers can be reheated in a microwave for 15–20 seconds.
Store Properly
Store leftover cake in an airtight container at room temperature for up to 2 days or in the refrigerator for up to 5 days. Reheat before serving to refresh the caramel topping.
Variations to Try
Caramel Pecan Apple Upside-Down Cake
Add 1/2 cup chopped pecans to the caramel topping for a nutty crunch. Toast the nuts lightly for extra flavor.
Spiced Apple Cake
Enhance the flavor by adding 1/2 teaspoon ground cloves and 1/2 teaspoon ground ginger to the cake batter. This variation gives the cake a warm, holiday-inspired aroma.
Mini Upside-Down Cakes
Use muffin tins to make individual-sized cakes. Reduce baking time to 20–25 minutes. These are perfect for parties or gifting.
Why You’ll Love This Recipe
-
Easy to Make: Even beginner bakers can master this cake.
-
Crowd-Pleaser: Its rich caramel and tender apple topping make it perfect for gatherings.
-
Versatile: Suitable for brunch, dessert, or festive occasions.
-
Flavorful: Combines the sweet, buttery richness of caramel with the natural tartness of apples.
Frequently Asked Questions
Can I Use Frozen Apples?
Yes, you can use frozen apples, but there are a few important steps to ensure the best results. First, make sure the apples are completely thawed before using them. Frozen apples retain extra water during freezing, which can make the caramel topping watery and prevent it from setting properly. After thawing, pat the apple slices dry thoroughly with paper towels to remove any excess moisture. While fresh apples are always the best choice for texture and flavor, frozen apples are a convenient alternative when fresh ones aren’t available, especially during off-seasons. Choosing firmer varieties, even when frozen, can help maintain the shape of the slices during baking.
Can I Make This Cake Ahead of Time?
Absolutely! This cake is an excellent candidate for make-ahead preparation, making it ideal for busy days or holiday gatherings. Bake the cake according to the instructions and allow it to cool completely in the pan. Once cooled, cover it tightly with plastic wrap and store it in the refrigerator overnight. When ready to serve, gently warm the cake in the oven at a low temperature or in the microwave for a few seconds. Warming it slightly brings back the softness of the cake and the gooey texture of the caramel topping, allowing the flavors to meld beautifully. This approach not only saves time on the day you plan to serve it but also enhances the richness of the caramel and spices.
Can I Freeze the Cake?
Yes, this cake freezes very well, making it perfect for preparing ahead or saving leftovers. After the cake has completely cooled, wrap it tightly in plastic wrap followed by a layer of aluminum foil to prevent freezer burn. You can freeze it for up to 2 months. When ready to enjoy, transfer it to the refrigerator to thaw overnight. Serve at room temperature for the best texture and flavor. Avoid thawing at room temperature too quickly, as the caramel topping may become sticky and harder to slice.
How Do I Prevent the Cake from Sticking?
To prevent sticking, grease your cake pan generously with butter and lightly dust it with flour. Using a good-quality nonstick pan can also help. After baking, allow the cake to cool for 10–15 minutes before inverting it onto a serving plate. This resting period gives the caramel time to set slightly, reducing the chance of apples or cake sticking to the pan. Running a knife gently around the edges before inverting can make the process smoother and preserve the presentation.
Can I Use a Different Type of Sugar?
Brown sugar is ideal for creating that rich, deep caramel flavor. If you’d like to experiment, coconut sugar or raw cane sugar can be used as a substitute, though the caramel may be slightly less rich and darker in color. For a subtle twist, try blending brown sugar with a small amount of maple sugar to enhance the sweetness with a natural, earthy note.

